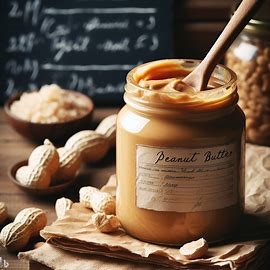
Homemade Peanut Butter: A Nutty Delight Straight from Your Kitchen!
Peanut butter, with its creamy or crunchy texture and nutty flavor, is a versatile and beloved pantry staple. While you can easily buy it from your local grocery store, there’s something special about crafting your peanut butter at home. Not only is homemade peanut butter delicious, but it’s also a healthier alternative, allowing you to control the ingredients and eliminate any additives. In this comprehensive guide, we’ll take you through the process of making your very own homemade peanut butter.
Table of Contents
Why Make Peanut Butter at Home?
Before we dive into the how-to, let’s explore the compelling reasons to make your peanut butter from scratch:
-
Control Over Ingredients: When you make peanut butter at home, you decide what goes into it. You can choose high-quality peanuts and avoid added sugars, hydrogenated oils, and artificial additives often found in commercial brands.
-
Customization: Homemade peanut butter allows you to personalize the flavor and texture to suit your taste. You can make it creamy, crunchy, or somewhere in between, and even add your favorite natural sweeteners or flavorings.
-
Freshness: Homemade peanut butter is as fresh as it gets. You can grind the peanuts just before you use them, preserving their natural oils and flavors.
-
Health Benefits: Peanuts are a good source of protein, healthy fats, and essential nutrients like vitamin E and magnesium. Making your peanut butter at home ensures you get the maximum nutritional benefit.
-
Cost-Effective: Buying peanuts in bulk and making your peanut butter can be more budget-friendly in the long run compared to purchasing pre-made jars.
Ingredients for a Homemade Peanut Butter
Let’s gather the essential ingredients for making homemade peanut butter:
- Raw Peanuts: opt for high-quality, unsalted, and unroasted peanuts. You’ll need around 2 cups for a standard batch.
- Salt (Optional): A pinch or two of salt can enhance the flavor, but it’s entirely optional.
- Sweetener (Optional): If you prefer sweet peanut butter, consider adding honey, maple syrup, or a natural sweetener of your choice. Start with a tablespoon and adjust to taste.
Equipment You’ll Need
To make peanut butter at home, you’ll need some basic kitchen equipment:
- Food Processor or Blender: A powerful food processor or blender is essential for grinding the peanuts into a smooth or crunchy paste.
- Baking Sheet: If your peanuts are not roasted, you might want to roast them in the oven. A baking sheet is handy for this step.
- Spatula: A spatula helps scrape down the sides of the food processor or blender to ensure even blending.
- Storage Containers: To store your homemade peanut butter, you’ll need airtight containers or glass jars.
The Step-by-Step Process
Now that you have your ingredients and equipment ready, let’s go through the step-by-step process of making homemade peanut butter:
Step 1: Roasting the Peanuts (Optional)
- If you’re using raw peanuts, preheat your oven to 350°F (175°C).
- Spread the peanuts evenly on a baking sheet.
- Roast them in the oven for about 10-15 minutes, or until they turn a slightly darker shade and release a nutty aroma.
- Remove from the oven and let them cool for a few minutes.
Step 2: Preparing the Peanuts
- If your peanuts are already roasted, you can skip the previous step.
- Place the peanuts into your food processor or blender. If you want to add salt or sweetener, do so at this stage.
Step 3: Blending
- Secure the lid of your food processor or blender and start on a low speed. Gradually increase the speed as the peanuts begin to break down.
- You may need to stop and scrape down the sides with a spatula to ensure even blending.
- Continue blending until you achieve your desired consistency. If you prefer crunchy peanut butter, leave some small peanut chunks. For a smoother texture, blend longer.
Step 4: Taste Test and Adjust
- Pause the blending to taste your peanut butter. Adjust the salt or sweetener to your liking. Remember that flavors can develop over time, so don’t overdo it.
Step 5: Transfer and Store
- Once you’re satisfied with the flavor and texture, transfer your homemade peanut butter to clean, airtight containers or glass jars.
- Store it in the refrigerator for up to two months or at room temperature for a few weeks.
Step 6: Enjoy!
- Homemade peanut butter can be enjoyed in countless ways. Spread it on toast, swirl it into oatmeal, use it as a dip for fruits and vegetables, or incorporate it into savory dishes like satay sauce.
Tips and Variations
- Natural Oils: Over time, natural peanut oils may separate from the peanut butter. Simply stir the peanut butter before each use to recombine the oil.
- Nut Variations: Feel free to experiment with other nuts like almonds or cashews to create unique nut butter blends.
- Flavorings: Get creative with flavorings like cinnamon, cocoa powder, vanilla extract, or even a touch of cayenne pepper for a spicy kick.
Conclusion
Homemade peanut butter is not only a delicious and customizable treat but also a healthier alternative to many store-bought options. With just a few ingredients and some kitchen equipment, you can enjoy the nutty goodness of homemade peanut butter straight from your kitchen. So, roll up your sleeves, give it a try, and savor the satisfaction of creating your pantry staple!

